Looking for a colorful Easter activity that’s easy, affordable, and totally kid-approved? Skip the pricey egg carton this year and say hello to Easter Marshmallows—a sweet twist on a holiday tradition!
With the rising cost of eggs, many families are looking for creative alternatives, and marshmallow dyeing is a fun, low-stress option that doubles as a treat. Kids will love snacking while they decorate, and cleanup is way easier (no cracked eggs or shell bits in sight!).
🍬 Why Try Marshmallow Dyeing?
- ✅ Budget-friendly
- ✅ No boiling or cooling required
- ✅ Totally edible (and delicious!)
- ✅ Perfect for little hands
- ✅ A fun way to mix art and snacks!
🧁 What You’ll Need:
Here’s where you’ll list your ingredients and tools. For example:
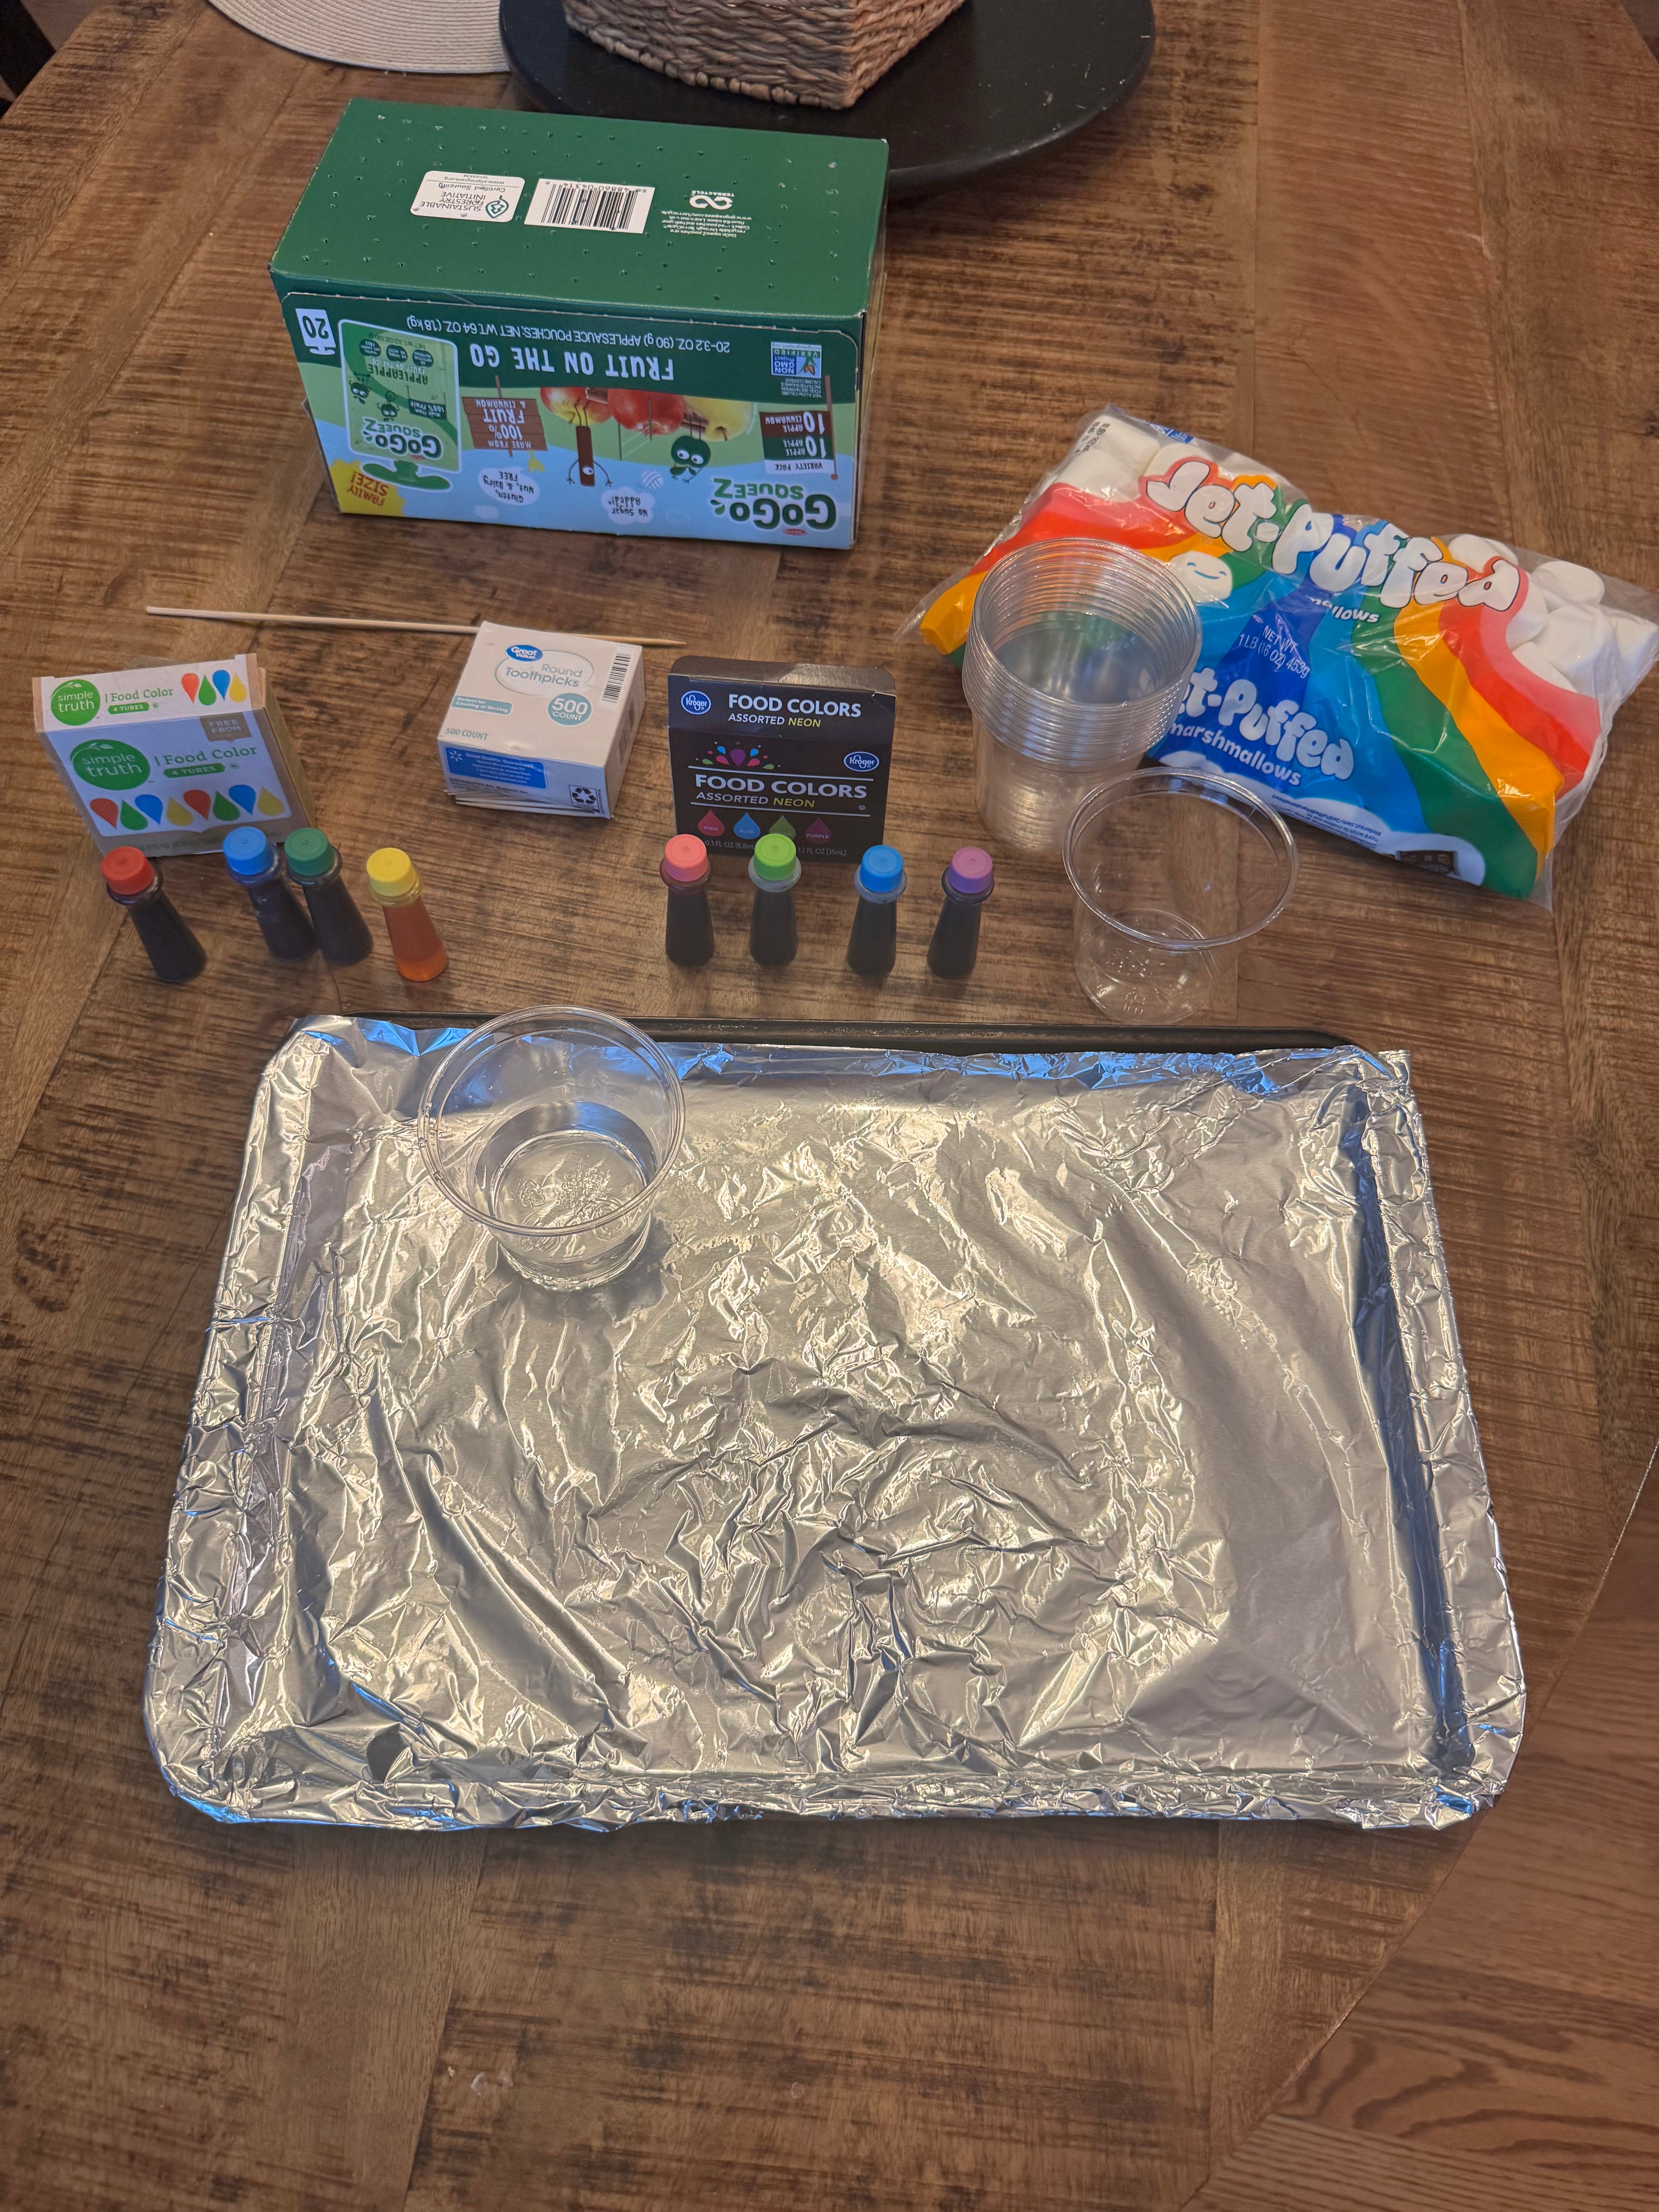
- Large marshmallows (Jumbo may work better)
- Food-safe coloring
- Toothpicks, skewers, or food-safe brushes
- Small cups or bowls for dye
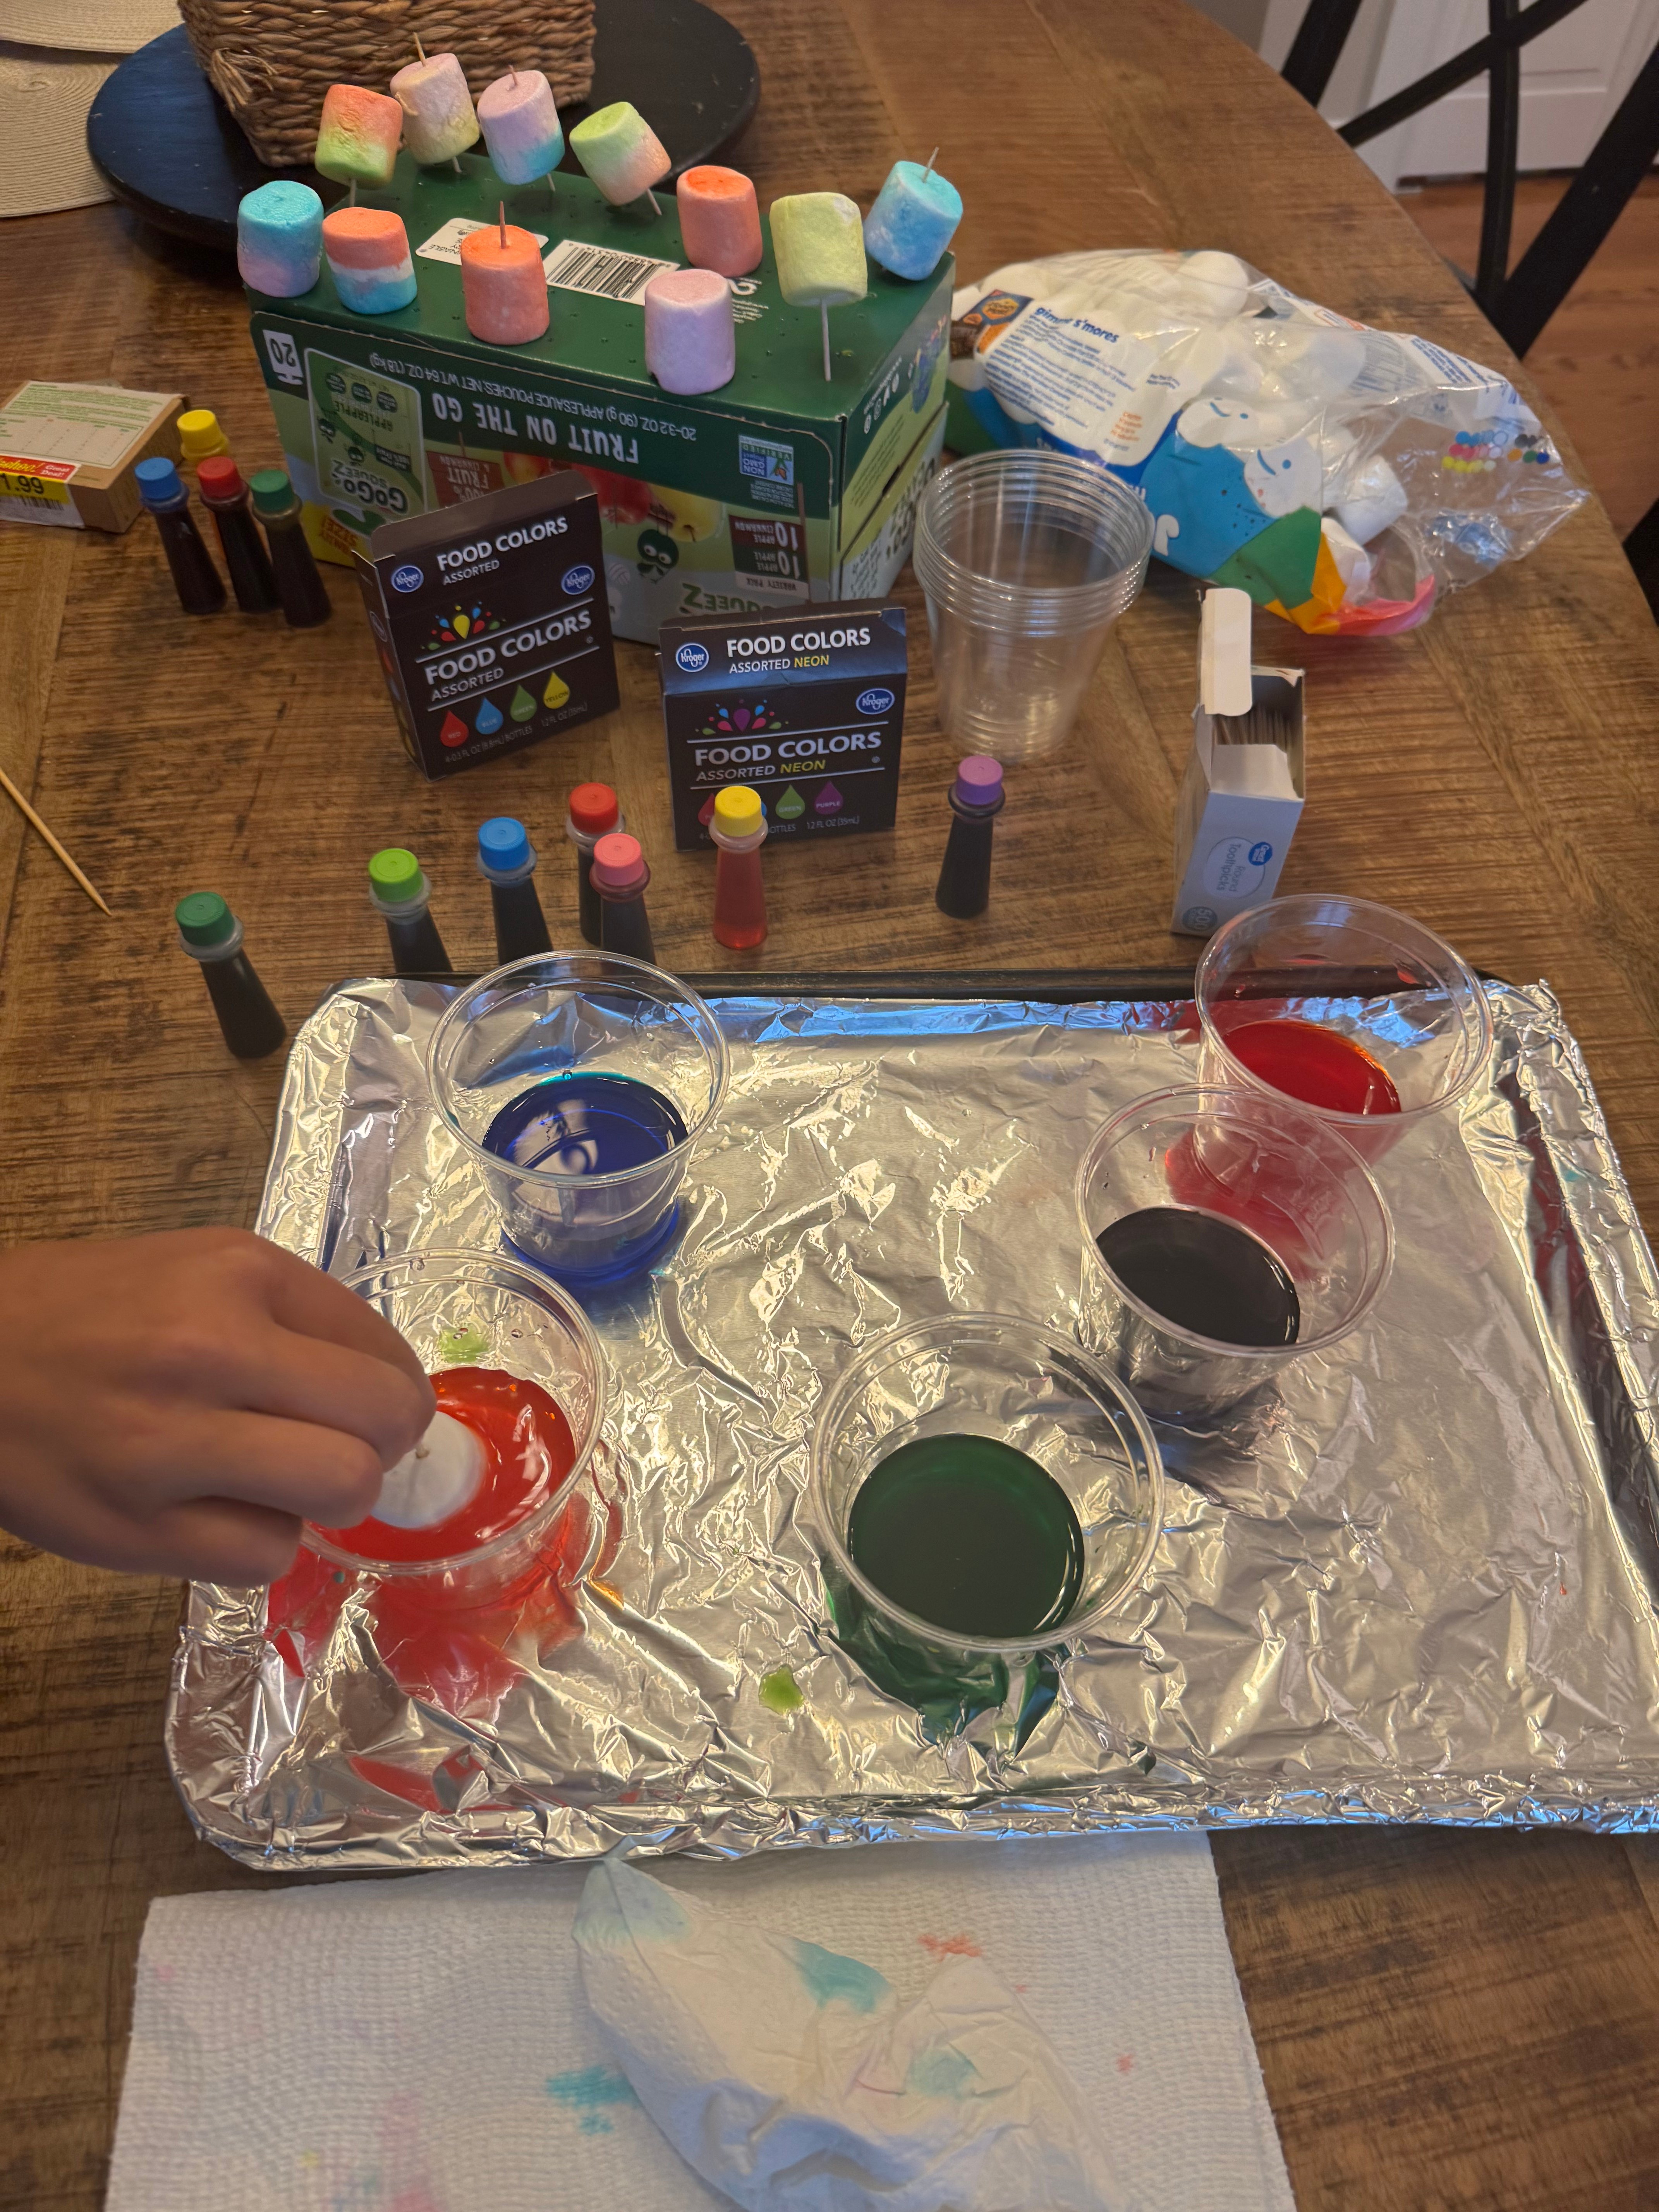
- Wax paper or parchment for drying. (We used a box with small holes for toothpicks to stick in)
🎨 How to Dye Your Marshmallows:
Insert your step-by-step instructions here. For example:
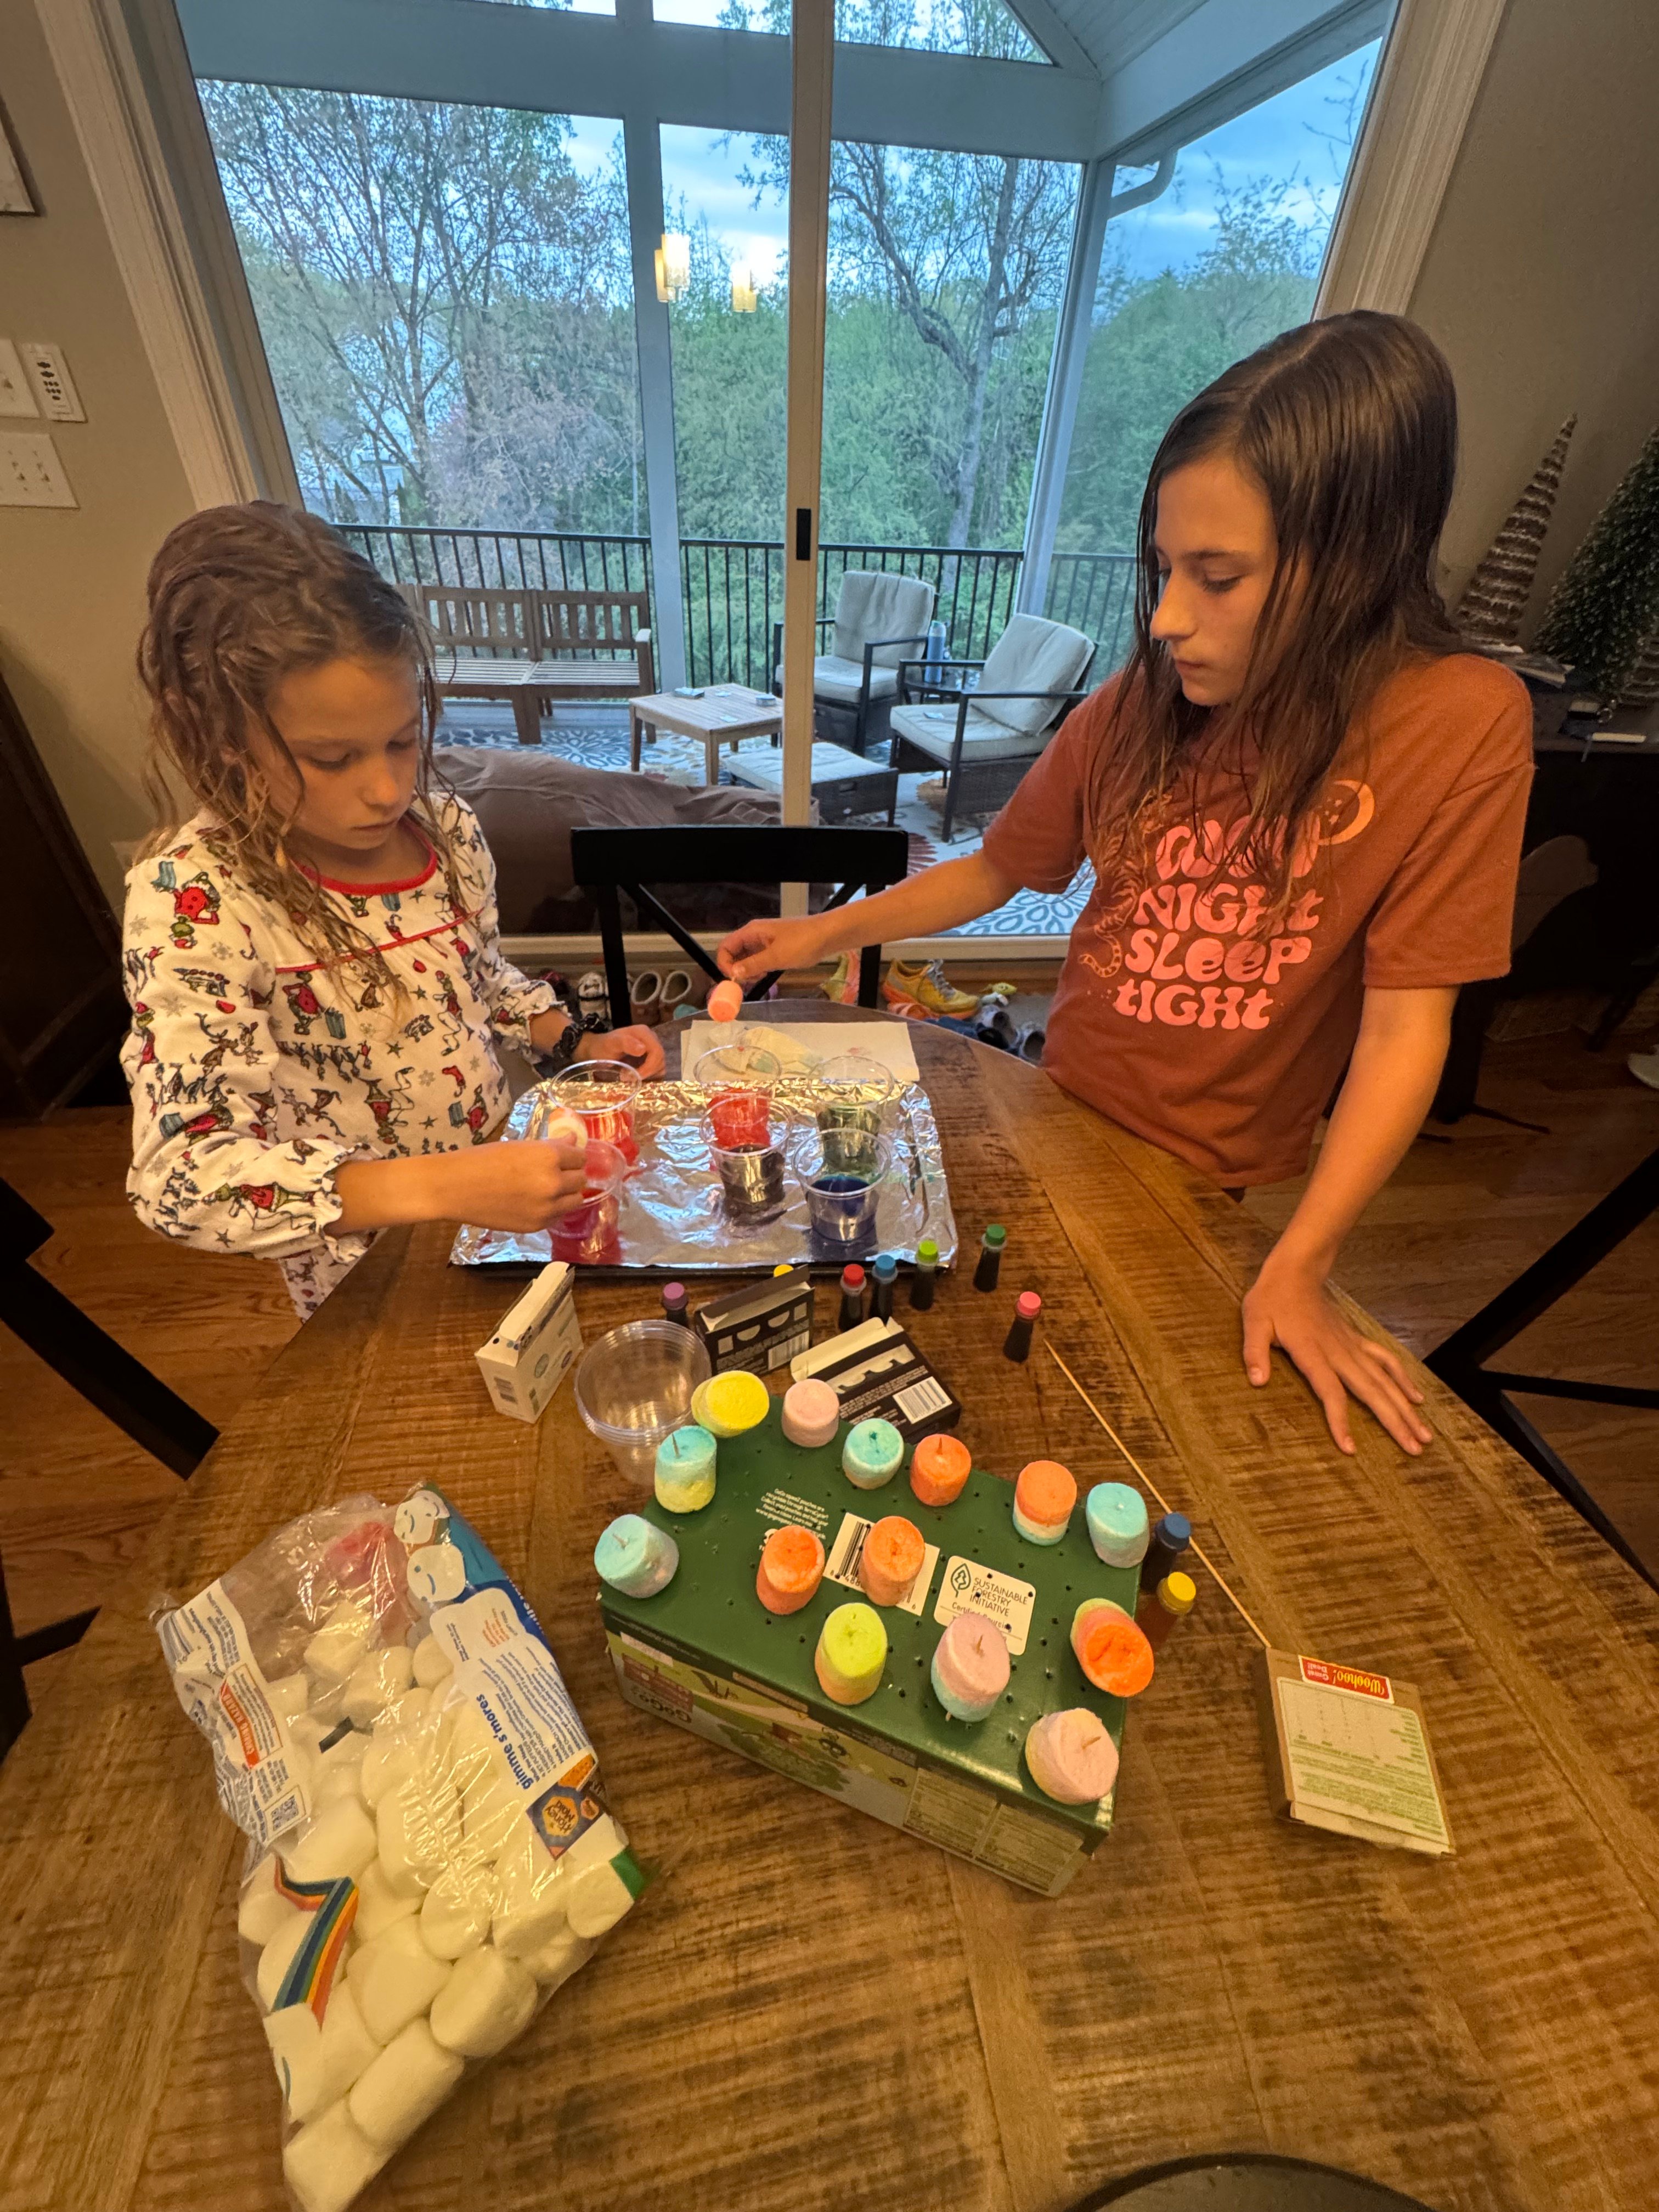
- Set up a clean workspace with paper towels nearby. A cookie sheet covered in foil underneath the dying cups helps to catch any drips or mess.
- Mix a few drops of food coloring with COLD water in small cups or bowls.
- Dip, paint, or swirl your marshmallows in the dye.
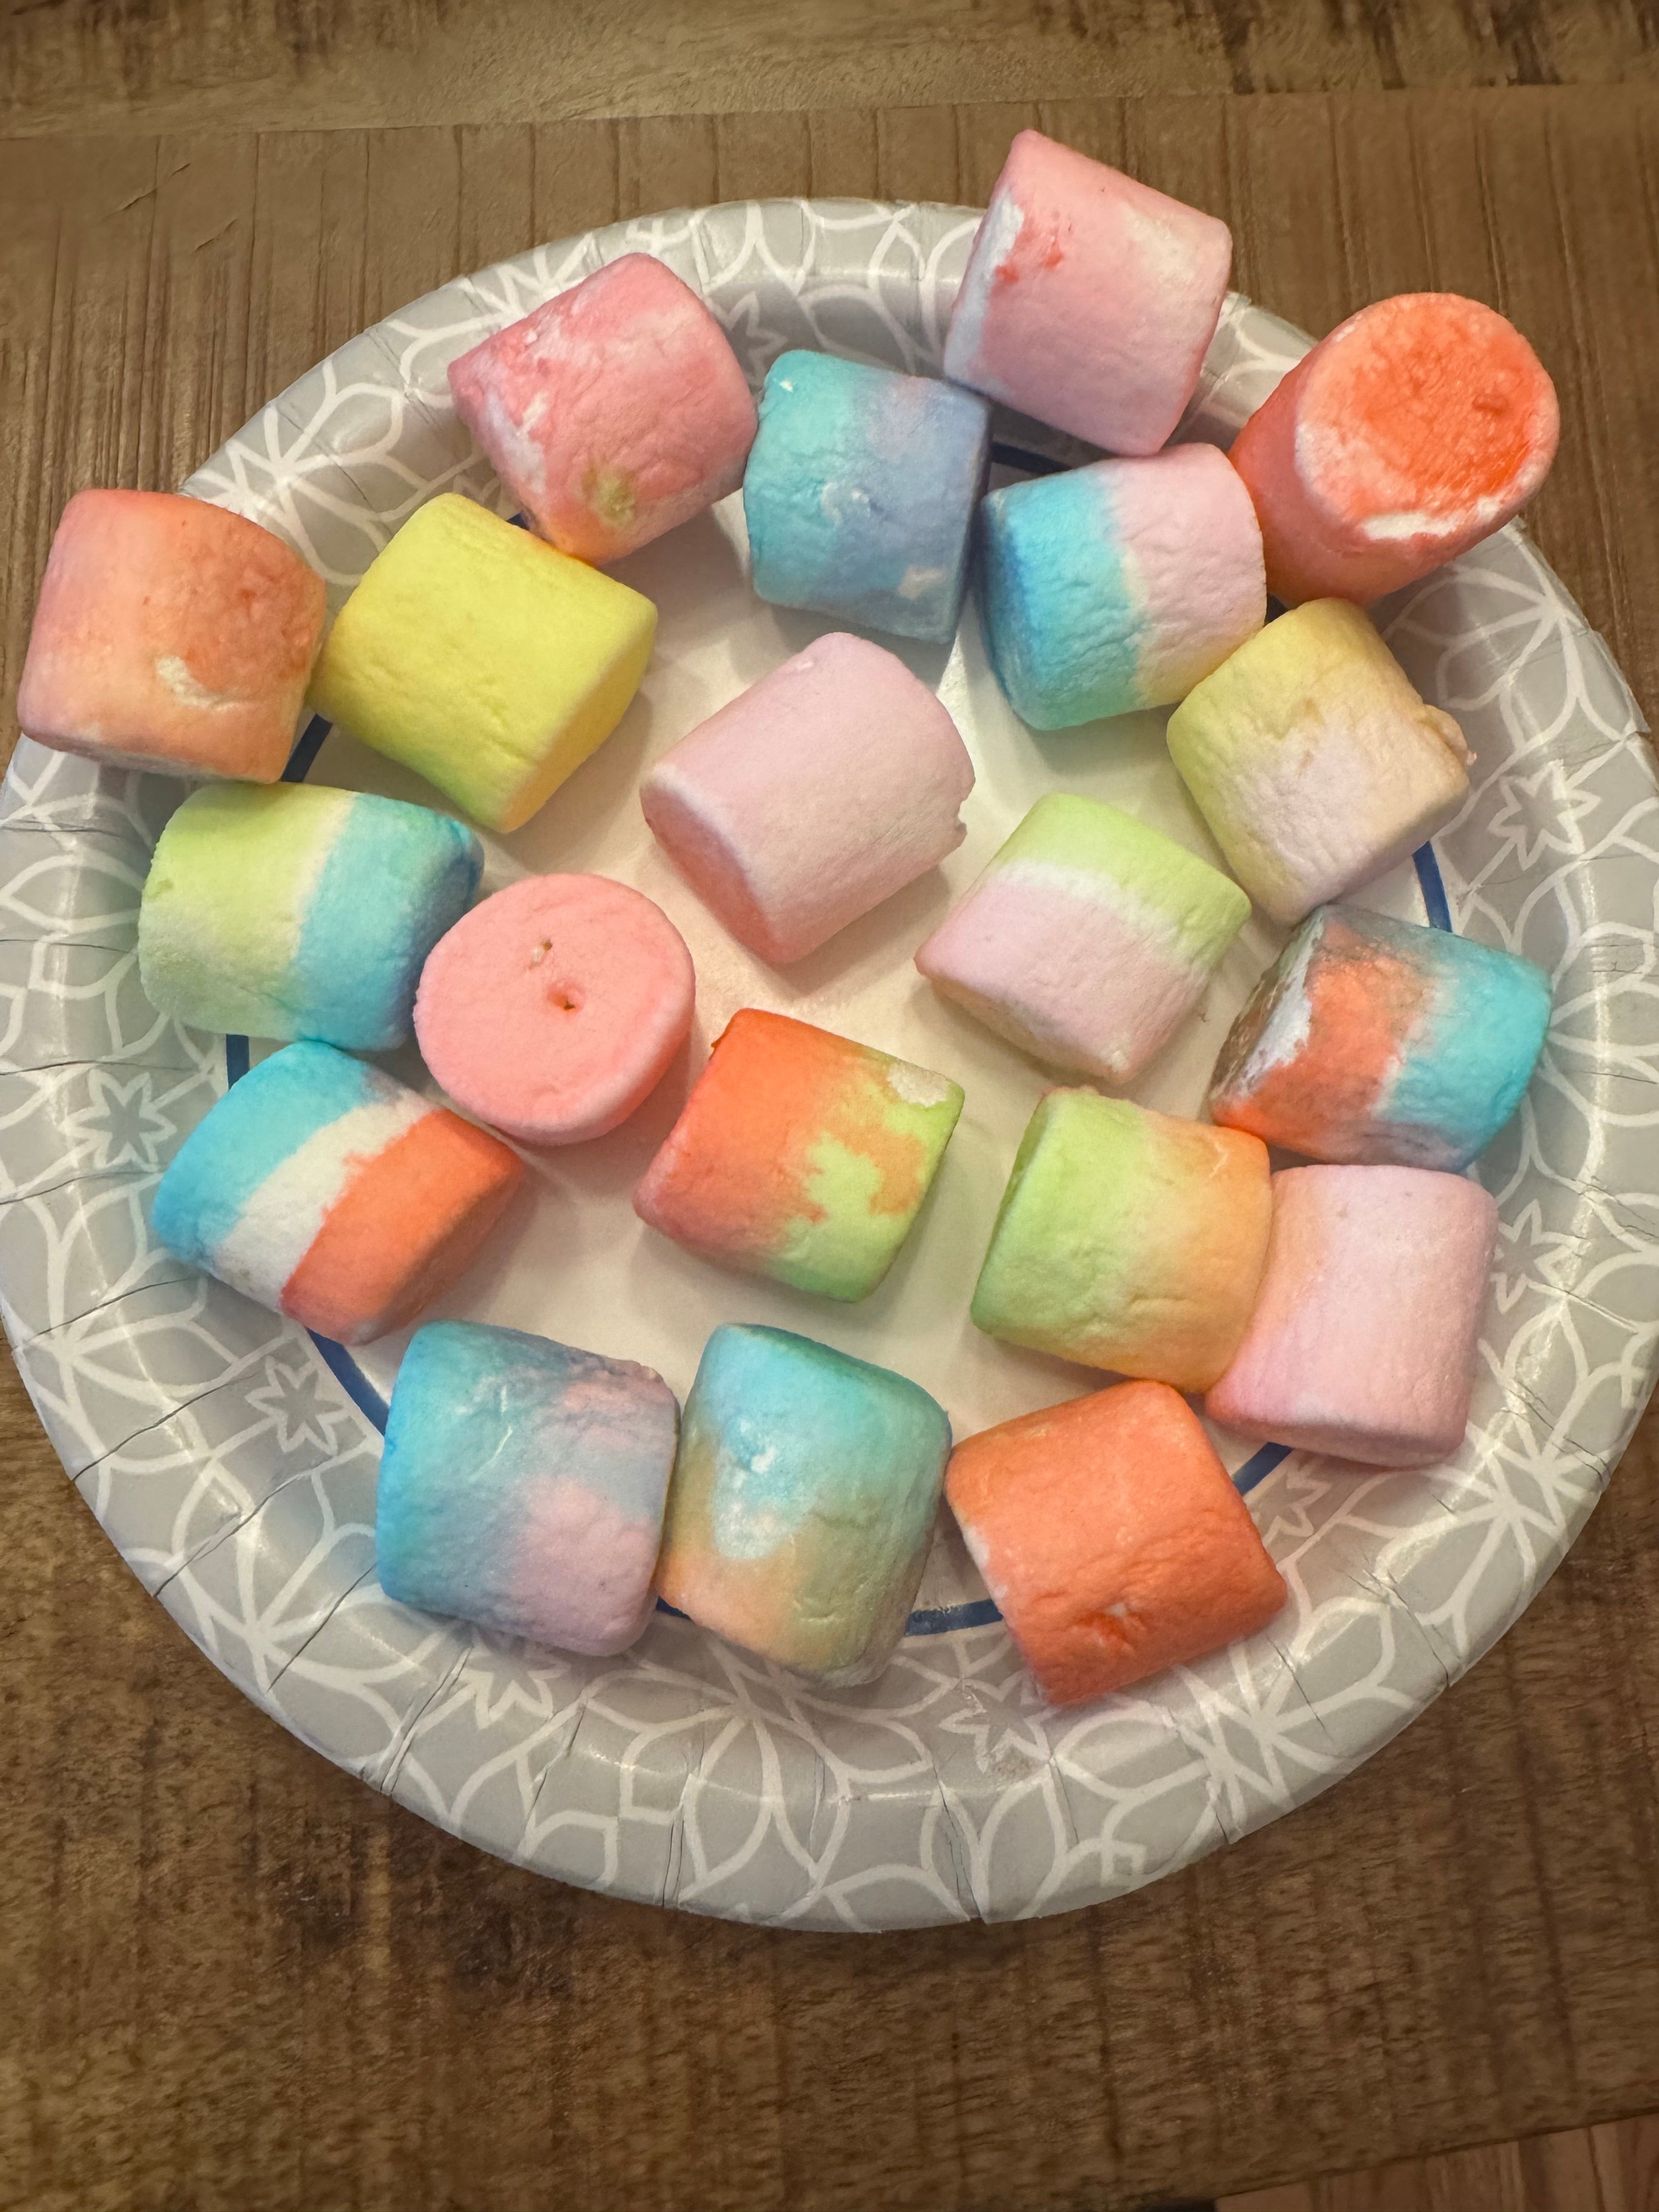
- Let dry and enjoy your colorful creations! (Lesson Learned: let the excess drip over the color cups for a minute or so to keep the excess color from bleeding. You may see in our pictures, we learned this with lots of trial and error and some were more patient than others. 😆
🐰 Bonus Tip:
Put your decorated marshmallows in Easter baskets, use them as cupcake toppers, or just munch them during movie night!
This twist on Easter decorating is proof that you don’t need to spend a lot to make special memories. So grab your marshmallows, bring on the colors, and let the snacking and crafting begin!